I always head to a forest when I need to de-stress, heal, get inspiration .... There's just something about the spicy, heady smells and the feel of the trees towering over one that seems like home. John Muir said, "Come to the woods, for here is rest."
The Japanese, I recently discovered, have a name for it - Shinrin-yoku. I've seen this translated as "forest bathing," "forest therapy," "immersing in the forest," and "taking in the forest atmosphere." And there appears to be actual research results showing benefits in boosting immunity and mood, and in reducing stress, among other things.
When I walk in our forest, I slow way down, looking at things in detail. And even though our forest is not very big, about 6 or 7 acres, I see new things every time.
And I come out rested.
Happy Creating! Deborah
As I wrote a couple of weeks ago, I decided to participate in some of the monthly jewelry/art bead challenges - I added one requirement for myself, that the main beads/pendants/etc. have to be made by me. This is mainly to jump start my ceramic work and get me thinking in different ways than I've become used to!
If you love art beads and jewelry made with them and haven't yet discovered Art Bead Scene Studio, quickly check them out. Whether you make jewelry, collect beads, or just like to look at gorgeous pictures, you'll love them! They have a challenge each month based on an artwork and this month's was to create jewelry and/or art beads inspired by Eugene Seguy's print Insects, inspired by the styles of art nouveau and art deco.

There were so many directions this one could go in! I decided to focus on art nouveau aesthetics, with their soft, flowing curved lines and inspiration from nature - this fits in perfectly with my style. Insects were a popular theme, especially butterflies, and I seem to be in somewhat of a deconstructing mood this month, so I chose to use a butterfly wing. After several mis-fires on how to decorate the wing, I went back to art nouveau's focus on nature and plants and printed the wings with leaves and Queen Anne's Lace. I added a bronze glazed, raised relief bead to give it bit of a metal feel.
I loved these so much I had to make a necklace using the Queen Anne's Lace butterfly wing and the glazed bead.
The final challenge of the month was another one to create jewelry using sunflowers for the September Honey Do List. This time I went in a more traditional direction and created a spacer which I then glazed in the Majolica tradition. This is generally thought to have started in 15th century Italy and involves painting terracotta clay with a white tin glaze and then decorating over it with pigments. I use a matte white that's non-toxic and paint over with underglazes and stains. Traditionally, the back is left unfinished or is burnished to show the terra cotta, but that doesn't wear well, so I cover mine with a clear glaze. These are the spacers I created ...
... and this is the bracelet I designed using one of them. I used a little leaf accent bead, jadeite beads, and silk sari ribbon.
I just have to add a bit to my post about doing these challenges. They seem to be working at getting my creative processes jump started! After a walk in the forest and focusing on the forest floor, I came back and made a few more pieces that are inspired by nature but are not as much in realism as I have been working.
I've updated the shop to add the art nouveau inspired pendants/bead sets and a few sunflower spacers. I'm currently working on more forest floor pieces and have put up the ones I have finished so far!
Happy Creating! Deborah
Happy first day of autumn! It's one of my favorite times of the year - cool mornings, brilliant fall foilage, and I love the holidays. Today I'm looking at three amazing fiber artists who capture autumn's feel.
UK artist Heather Collins gets her inspirations from walks through the woods and along the seashore. Her sculptural embroidery is mainly pieces that look plucked from the landscape - the realism is amazing! The apples on our farm are starting to ripen and fall, filling the air with a wonderful sweetness ... looking at Apple Box, I can almost smell it without even venturing outside! Be sure to look at the gallery on Heather's website and her other pieces.
I've always enjoyed looking at tromp l'oeil based artwork in any medium! Laura Breitman's fabric and paper collage pieces use color and light to really fool one's eye. Looking at the image of Looking Up, it's hard to tell whether or not one's looking at a photograph. See the close-up from the work? She's brilliant at combining the fabrics in such a way that the viewer sees real trees and leaves. There is a lot more of her work here.
Fiona Robertson works in embroidery, using machine stitching combined with handwork to get some pretty amazing details. Autumn Woods captures a late autumn day in the woods beautifully. See her other work here.
Happy Creating! Deborah
I've been in love with the recycled silk ribbon that seems to suddenly be everywhere, but I haven't been able to figure out what to do with it. That didn't stop me from buying some, however! Then, while I was stringing pumpkin bead sets onto small pieces of it, it occurred to me that silk ribbon would make a great necklace! The ribbon is thick enough that the beads stay right where I put them, even without knots. I put a clasp on mine to make it look a little more polished, but they can also just be knotted like in the tutorial from last week on pendant necklaces. You can also refer to that post for how to work with jump rings, if you're new to jewelry making!
First a word about where my silk ribbon came from - I ordered it from Darn Good Yarn. I love the colors it comes in and that it is made by women in fair pay cooperatives in India and Nepal. And no, Darn Good Yarn doesn't pay me - I doubt they even know who I am past my name on a couple of orders!
Materials:
*a little less than a yard of silk ribbon
*a set of beads with larger than normal holes
*sewing needle and thread to match the ribbon
*tapestry needle
*clasp
*two jump rings - one small and one medium
*two jewelry pliers
First, you'll probably want to iron your ribbon to get the creases out - as you can see from my photos, I didn't. The creases aren't visible when the necklace is worn, so if you're lazy like me, who didn't want to go upstairs to use the iron, it's not essential. Next, cut diagonally at the top of one ribbon end. This makes it easier to thread. Don't worry about all those loose strings yet.
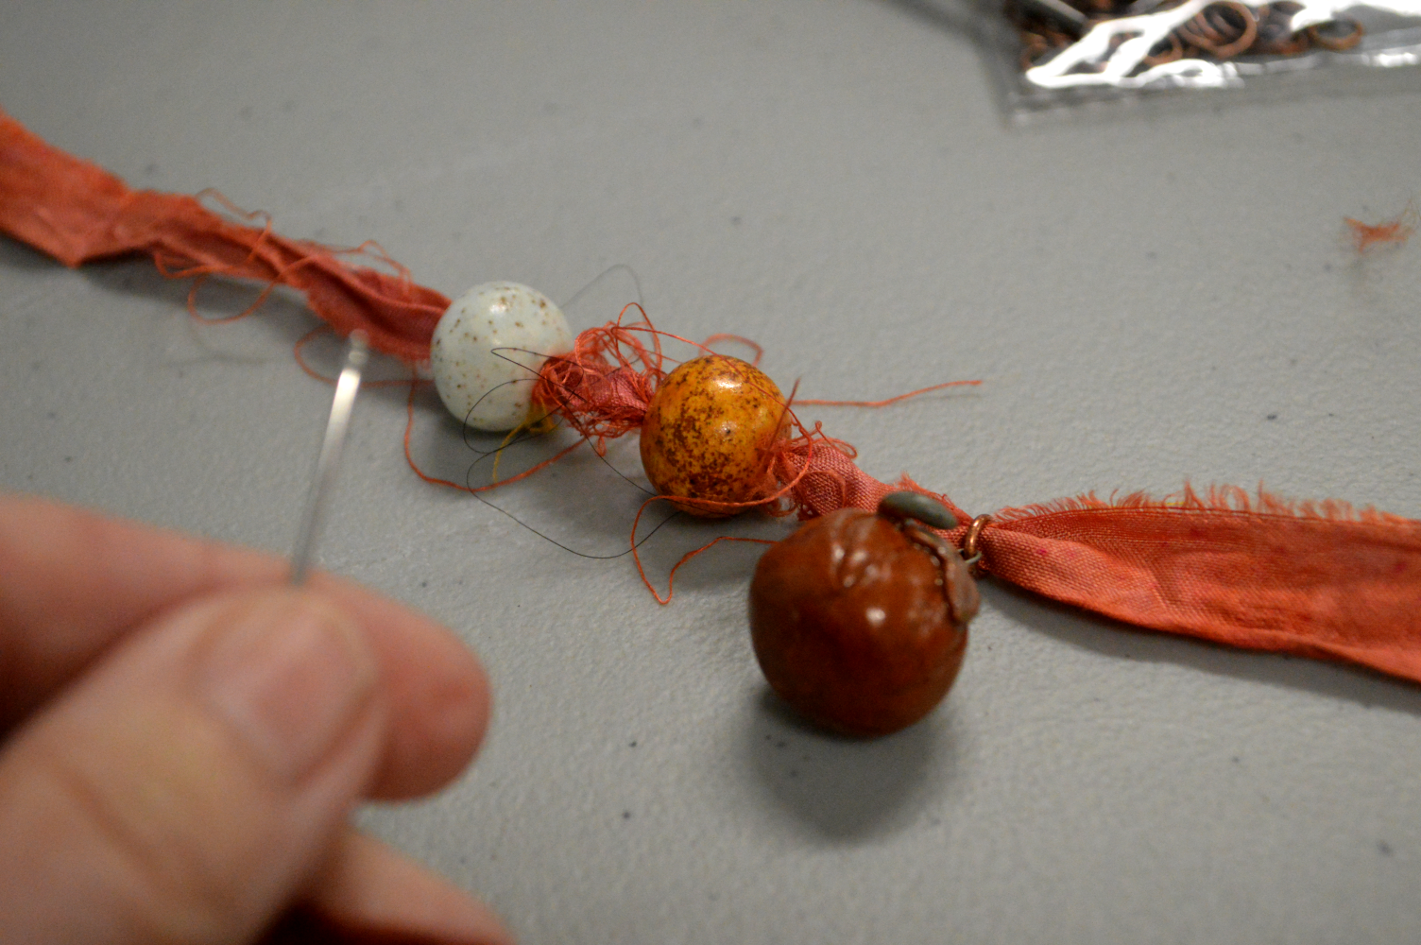
Put the tapered end through a large eye tapestry needle ....
... and begin stringing your beads. Start with the bead you want to be the first one on the right side (when looking at the necklace lying on the table).
I have a pumpkin focal bead on mine, so I put a jump ring on it ....
... and strung it on, followed by the last two beads.
Next, put a jump ring on the clasp.
Put one end of the ribbon through the clasp's jump ring ...
... fold it down about one inch ...
... and sew in place.
Do the same with the other end of the ribbon, using a jump ring. I used a slightly larger one than I normally do since it has the ribbon going through it and still needs room for the clasp to easily hook onto.
Now you can take all those loose strings off!
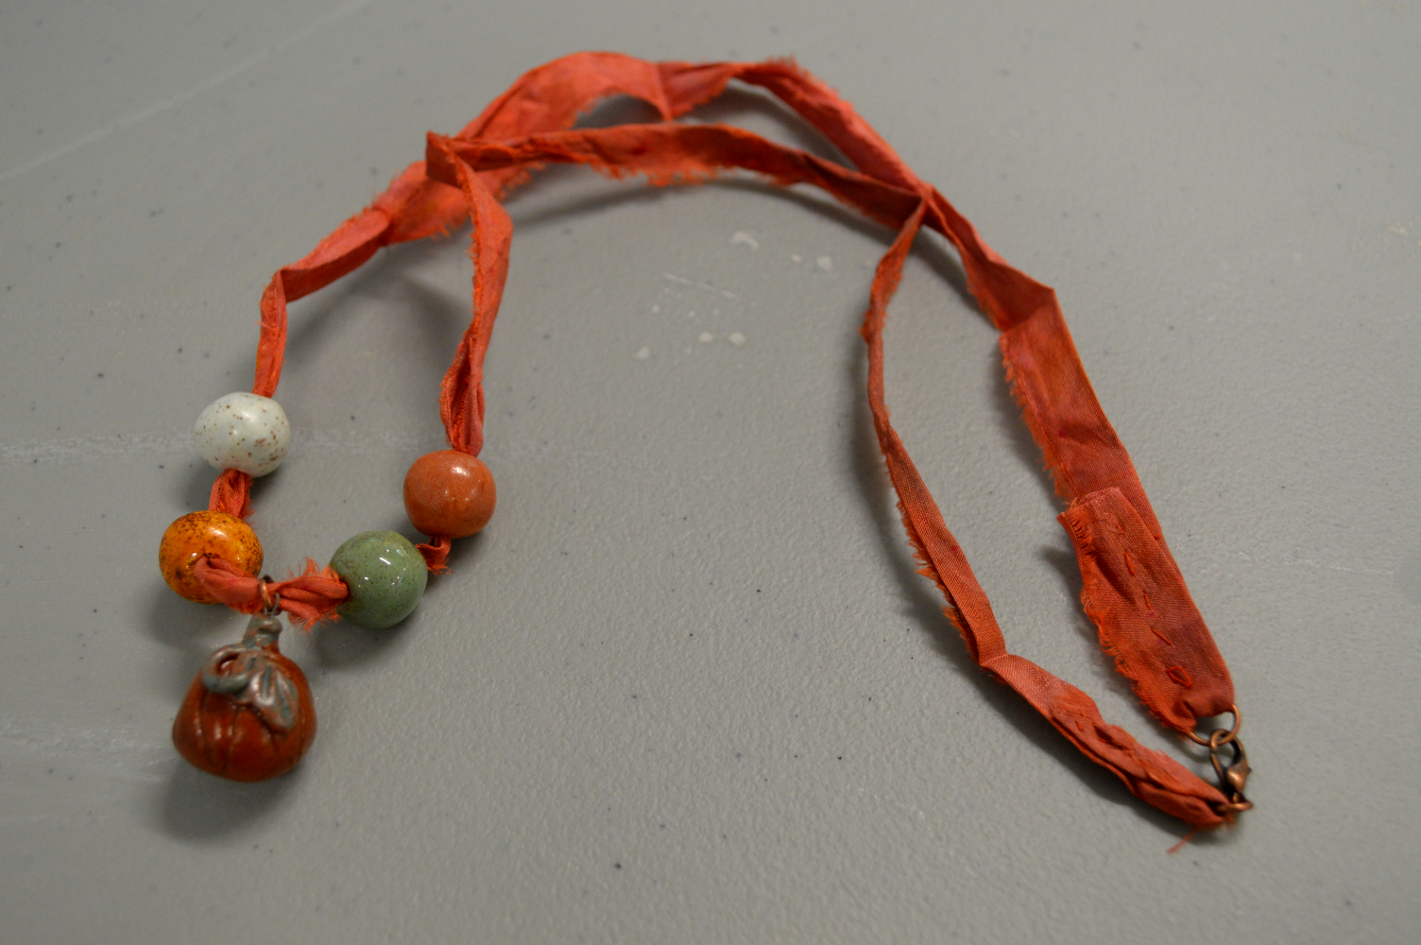
And voila, you have a necklace! Okay, anyone on my gift list, don't finish reading this sentence - these would make great gifts, right?
I have a few of these pumpkin bead sets left in the shop and am hard at work on several sets for the winter collection!
Happy Creating! Deborah
Inspiration is a funny thing - sometimes one has an idea for exactly what needs to be done, exactly how to create a piece. And sometimes an inspiration is so filling that it makes it hard to figure out the details of a project. Which brings me to sunflowers ....
Sunflowers are hands down one of my favorite plants (not just flowers) on the planet! They mean summer, they go through so many changes, there are lots of varieties, they're usually easy to grow, and they are just plain beautiful. I often feel very inspired by sunflowers, so one would think there would be a lot of sunflowers in my body of work. Nope. Except for a piece of ice dyed fabric I once made that turned out to have a sunflower on it, there is none. Anytime I've tried to come up with a sunflower idea, I'm not happy with how it looks - too cliched or kitchy, usually.
I've been looking at a few blogs lately that have monthly challenges. What a good way to step out of the box, try new things, and actually get something done! The challenges remind me of being in art school and getting assignments - at first you work through the too usual ideas that everyone has already done and you keep on going until you come up with something new and, hopefully, exciting. And you keep at it because you have to turn something in on the due date! The challenges I've found so far are all for art beads or jewelry (if anyone knows of quilting ones, tell us in comments!). Which brings us back to sunflowers!
Imagine my surprise when I looked at not one, but two of this month's challenges and found that the subject was .... sunflowers! I had already told myself that this month I WAS going to actually do the challenges, not just lurk. So I wandered around looking at all of our sunflowers. Now this is the middle of September and they're all looking pretty ragged around here. But still beautiful in a very different way ...
I didn't really feel into making dead or rotted sunflower jewelry, but a sunflower deconstructed, taken down to its parts did sound interesting. I decided to make ceramic petals, looked around and found some bone beads that reminded me of sunflower seeds and a couple of green glazed beads I made for a different project. And this is what I came up with for the We're All Ears Sunflower Challenge-
The wire wrapped circle wasn't difficult to make - just a little fussy. I wrapped the wire around my finger twice and then started wrapping the circle I got with the long tail that was left. Needle nosed pliers helped in getting the wraps to lie flat and closer together.
So one challenge down, two to go ... and one is another sunflower challenge. I'm going to see if I can come up with something using some other sunflower components I made - beads and small charms. If you have ideas you'd like to make using the petals or want to see the other sunflower components, they are available for sale in the shop. Either hit the shop button at the top of this page or go to stoneypointstudio.com.
Happy Creating! Deborah
Buying artist made pendants is an easy way to build up your jewelry wardrobe and less expensive than buying artist made ready to wear jewelry because you do the work of putting it together yourself. Today I have an easy way to make those pendants into necklaces!
Besides a pendant, you'll need cord - and depending on which technique you use, you may need super or jewelry glue, two cord end caps, two pairs of jewelry pliers, two or three jump rings, and a clasp.
There are lots of differents types of cord one can use! I like 1 or .5 mm leather or cotton cord the best. Today I'll be using the cotton.
There are two ways you can attach your pendant to the cord. The first way is quick and easy if you have a pendant with a large hole, such as the harvest moon on the left. If your pendant has a wire loop at the top, you'll need to attach a jump ring before putting it on your cord. I'll get to how to do that further down!
To attach cord directly through a larger hole, cut your cord about three inches longer than you want it to end up being. I like my necklaces about 26 inches, so I cut the cord at 29 inches. After the cord is cut, line the two ends up together.
At the opposite end of your cord, you'll have a loop. Put this loop through the hole in your pendant, working from front to back.
Now take the two loose ends of cord and put them through the loop.
Pull tight and you're done!
If you're using a jump ring to attach your pendant to the cord, get two jewelry pliers. On the jump ring you'll notice a line where the two sides meet. Put one pair of pliers on either side of that line (needed a third hand to run the camera!) and twist slightly to open the jump ring up.
Insert the opened jump ring through the wire loop on your pendant. Again using a pair of pliers on each side of the opening in the jump ring, close the ring by slightly twisting in the opposite direction.
Now you can just string your cord through the jump ring.
You can also use a jump ring on pendants with holes in them - you'll just need a larger jump ring!
Now that your pendant is on the cord, there are two ways I'll show you today to deal with those loose ends. The first way is super quick, however it does leave a knot in the back (works if you have long hair) and you have to have made the necklace long enough that it'll fit over your head.
First, line the two ends up.
Next, bring the loose ends on top of the cord to make a loop.
Pull the loose ends through that loop - from back to front.
And pull tight - you're done!
For a more finished look, use cord end caps and a clasp. First put a drop of glue into one of the end caps ....
.... then push one of the ends of the cord into it.
Repeat with the other end cap and cord end.
Let the glue set before you continue.
Next, open a jump ring, place it through the hole in one of the end caps, and close the jump ring. Open another jump ring and place it through the hole in the other end cap. Before closing it, put it through the hole in the end of the clasp.
Close the last jump ring and you have a new necklace!
The pendants I used today are handsculpted ceramic, fired multiple times with different layers of stain and then fired one last time with a clear glaze. They'll be available on Friday in my shop at stoneypointstudio.com. If you go there before Friday, you'll be able to look around at a few things on the site, however the shopping button will say "Coming Soon."
Edit: The shop will be open 7 am Friday September 15th!
Happy Creating! Deborah