The other day at my local fabric shop, I overheard a woman saying she would never try a certain quilting pattern because she would have to cut edging on the bias and that was so hard. "NO, NO, NO, NO!!" I wanted to butt into the conversation she was having. My husband was with me, so I behaved. Seriously, though, cutting strips on the bias is easy-easy! And then you can turn them into bias tape, my all time favorite binding/edging.
Bias tape is a great way to cover a raw fabric edge decoratively. This bib is made from a layer of cotton fabric and a layer of flannel and is held together with bias tape.
When I was in jr. high and first learning machine sewing, bias tape came in all sorts of wonderful colors and patterns - now, not so much. The offering is pretty limited. So my solution is to make my own bias tape. It ends up being a fraction of the cost and gives you yards and yards, which can become a problem when you try figuring out how to store all the stuff!
To make bias tape, you need:
*fabric - I usually buy a yard and make a gazillion yards of bias tape, but a fat quarter makes enough for most projects
*a yardstick or other long measuring tool - a wide, clear quilting ruler is nice
*either a bias tape maker or a tool that forms it by hand - I make a LOT of bias tape, so last year I treated myself to a machine - I love it!
*scissors - or a large cutting mat and rotary cutting tool, I don't have these yet
*disappearing fabric ink pen - or a Sharpie, the ink will be on the inside of the tape
*an iron
*a pin
Making a long bias strip - this is the first step to either using a machine or a hand tool
1. The first step with any method is to make strips of fabric. I make double fold bias and use 2 inch strips. Place your fabric on a large surface on the bias - that just means that if you have a yard of 36 inch material, it will look like a diamond.
2. Draw a straight line down from one side of the top point. If your fabric has dots, like mine, follow a line of dots.
3. Cut along the dotted line. Draw a line 2 inches from the first line - keep doing this until all fabric has lines on it.
4. Cut fabric on the lines - you'll end up with a pile of fabric strips.
5. Now the fabric will suddenly change! Actually - I redid these photos to make them a bit more clear. Lay one strip of fabric out with the right side up. Lay another strip of fabric over its end, as shown below, with the right side down.
6. Sew from the point on the bottom piece diagonally as shown below. Make sure you're exactly on the point when starting so you have a smooth edge on your bias tape.
7. Trim the seam as shown below.
Sometimes you'll be starting with strips that have right angle corners. If so, line up the fabric as shown below and sew between the red dots. Again, make sure you're starting exactly in the corner of the bottom strip.
8. Continue attaching strips together until you have a loonnnggg strip! Press open the seams and you're ready to make this long strip into bias tape.
Machine Method - this is the machine I use
1. Insert one end of the strip through the slit in the middle of the roller. Roll your long strip onto the roller so that the right side of the fabric is up. Set your roller in its spot (you'll see this in a minute).
2. Take the end that comes off the top of the roller and insert it through the bias folding attachment. I find this easier to do when I've recut the end so it comes to a sharp, thin point.
3. Snap the folding attachment into place, pull a length from it, and lay the length across the heating plate.
4. Snap on the heating/roller piece and turn the machine on.
5. When the green light comes on, press run and watch the piles of bias tape pour out! If you insist on overloading the roller (like me), you'll have to do a bit of guiding for awhile.
6. To use your bias tape, the next step is to iron it almost in half. With bias tape, you want one edge to come just underneath the other. This helps to catch the back tape when you're sewing it on.
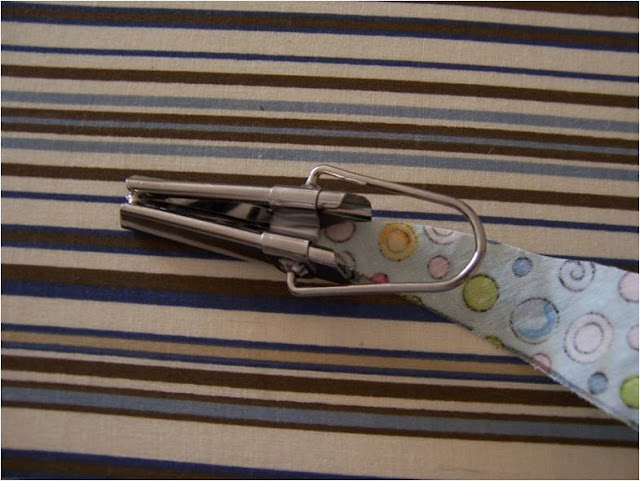
Hand Tool - this tool makes one inch tape, in case you notice the difference from the first tape.
1. Follow the same steps as above until you have sewn your fabric strips together into one long strip.
2. Put one end of your strip through the folding tool - again, it helps to cut it to a sharp, thin point.
3. Pull a little bit of fabric through the folder and pin it to the ironing board.
4. There are several ways to do the next step, so play around with what is easiest for you. I put my left hand over the folding tool and slowly push it to the left while ironing the folds flat.
5. I've lifted the iron off to show you what's happening underneath.
6. Iron the tape in half in the same way as with the machine method.
There are two ways to put bias tape on. The easiest is the method I used on the bib. Encase the fabric edge in the bias tape, making sure the long side of the bias tape is on the back and the shorter side is on the top (or the side you'll be stitching from). Sew close to the fabric edge of the bias tape edge.
The other takes longer but looks nicer on some pieces, like quilts. Open up the bias tape. Put the right side of the tape to the right side of the fabric. Sew using the fold on the bias tape as a seam guide. Fold the rest of the bias tape over the seam and hand sew in place.
This gives a nicely finished edge.
Next week we'll practice putting on bias tape while making a cute one yard apron!
Happy Creating! Deborah


At step 5, you have pinned the strips of fabric together in a way that means you have a 'step' in your tape. Jennie Rayment shows a technique where you have the tip of each piece standing proud of the straight edge of the fabric. When stitched together the tape is in a smooth straight line, rather than stepped.
ReplyDeleteI probably haven't explained this very well but you should be able to find her technique online.
Actually, I don't end up with a step - it is a straight line, but the angle of the picture doesn't show that well. Time for a new picture! Step 5 also shows the seam already trimmed - I lay the ends of two pieces of bias tape perpendicular to each other right sides together and sew diagonally (where the pin is placed). This is probably worth re-doing the photos to make that step more clear! Thanks!
ReplyDeletecan't you make bias tape in one continual piece?
ReplyDeleteYes you can - you still have seams, though. There's a good tutorial at http://www.coletterie.com/tutorials-tips-tricks/continuous-bias-tape-tutorial on how to do that. It's just as easy for me to make it using the strip method - it's probably just a matter of personal preference!
Delete